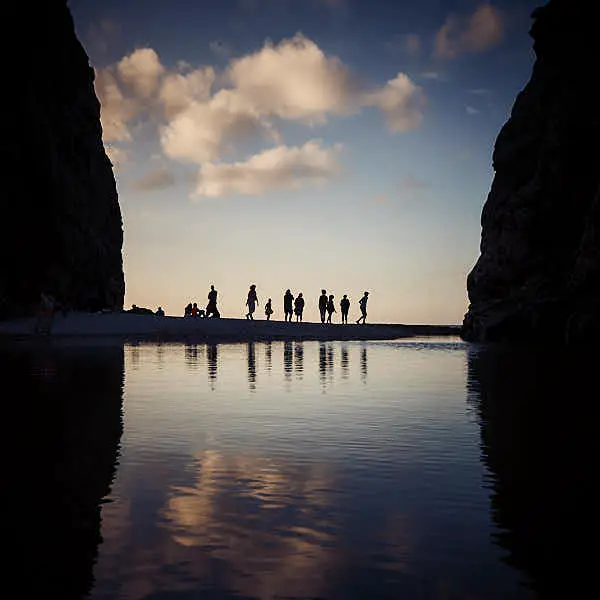

Going out and capturing some of your favorite views on camera is a great way to unwind from a stressful day. However, sometimes you end up with less-than-ideal photographs. That’s where the beauty of editing your photos comes in; you can get rid of many of the undesirable blemishes you may see.
Simple photo editing includes fixing exposure, white balance, red-eye, and adjusting the colors in the photo. More advanced techniques may be using gradients and using noise correction. There are several types of filters as well that can be used to make a photo stand out.
If you aren’t sure what any of these editing features are, we’ll explain them all below in the article. Hopefully, you’ll pick up some techniques to make your photography look even better. And, you don’t even have to have expensive editing software to get your photos to look amazing.
Basic Editing
Basic editing is something that you can do on your phone or your laptop. Both will have basic editing software already installed. Although you may not be able to access some of the more advanced features that you might see in Adobe Lightroom or Capture One, you can still make edits that make your photography stand out.
The types of editing that are discussed in this section are all things that you can do with your basic software. As long as you have confidence in yourself as a photographer, you can still get dazzling results on a free editing software program. If you are just starting out, you can find many useful tutorial videos of how to use these techniques on YouTube.
Exposure (Brightness)

Exposure is one of the most important aspects when doing photography. This is how long the shutter of the camera is exposed to the light. If your shutter speed is slower, you are going to have more light coming into the window of the camera. If it is faster, you have less light. This is going to determine how bright or dark your photo looks.
If you have a phone, this same concept is applied. You may not hear the shutter clicking as it does on a camera, but it is still doing the same thing. Pay attention the next time you take a picture in a dark room. Do you notice how it takes longer for the camera to focus on what you’re taking a picture of? And how it takes a long time to even show the shutter clicking? This is the amount of light the camera on your phone is being exposed to.
Now that you have a better understanding of what exposure is, we can discuss how we can make edits for this on your software. On your phone, you do all of your edits by pressing “edit.” To fix the exposure on your photo, you’ll click on brightness. Let’s say that you have a photo that is way too bright (overexposed in photography jargon). You will want to lower the brightness in your photo, which should help to correct some of that brightness. However, your photo may not be of the best quality. It is much harder to do editing on an overexposed photograph because going too far will make your photo look grainy.
If your photo is super dark (underexposed) you can increase the brightness. You may think that your photo isn’t going to look good because you didn’t have enough exposure when you took the photo. Surprisingly, you are more likely to get a better quality photo that is underexposed than you are to get one that is overexposed. You can add light to the photo and see whether or not it is grainy. In the photography world, it is much easier to correct for a lack of lighting, than to correct for too much.
Red-Eye Correction
Growing up, you may remember seeing pictures of yourself as a kid with your eyes a nice, bright, shade of red. This is caused by the light reflecting from the pupil. So, another basic correction that comes with software editing is a red-eye correction filter. This is amazing! You can transform vampirish photos of your siblings, children, friends, or clients back to their normal form. All you have to do is click on red-eye correction and poof! the problem is gone as if by magic.
Cropping
This technique should be familiar to almost everyone. It seems to be one of the simplest functions of editing software. In reality, it is not so banal when considered as part of the image composition. A smart crop can turn an average photo into a good one. Sometimes it happens by accident, you just have to deal with it.
If you are wanting to take your cropping skills to the next level, consider using the rule of thirds. In photography, we don’t want to have our pictures perfectly centered. This stops the eye from moving around the photo. Instead, it is important to make sure that the photo is slightly off-centered, either to the right or left. If you want to guide the viewer’s eye, you can do this using the golden ratio as well.
Even if you have never heard of this rule, it is instinctual. If you think about your favorite photographs, what makes them so good? The composition and colors are important factors and the ones we look at the most. However, if you think about how things are positioned, you may start to see the subtle effects that that position has on how you see that piece of artwork.
Color Adjustment (Saturation)

Another easy technique to use when editing your photos is to adjust the colors. Depending on what program you have, this can be done in a number of ways. If you have normal editing software on your phone or computer, you’ll be able to adjust how much color you want in the photo. If you want it to be black-and-white, you will have no saturation.
If you want to have a lot of color, then you can have the saturation all the way up. This brings out the colors of everything even more. Increasing the saturation of a photo does bring out the warmer colors. The browns will be much brighter and warmer. Everything will stand out more vividly.
If you are using programs like Capture One, Luminar, Adobe Photoshop or Adobe Lightroom, you have more control over the colors you want to adjust. In Adobe Photoshop, you can adjust how much red, green, and blue is present. These three colors are the tiny pixels that create the different colors you see in your photo. If one of your pictures looks like it has a lot of yellow in it, you can either tone down the yellow, or increase the blue in your photo. A similar process and format can be done with almost any professional photo software.
Vignette
Another basic editing feature is the option of creating a vignette. A vignette is basically a circular shadow; the edges of the photo are darkened, helping to draw the viewer’s attention to the focal point of the photo. The vignette creates a frame for your photograph. This might be a fun tool to use if you have baby pictures. You can use the vignette to frame your baby.
You always have the choice of how far you want to push the vignette. You can have some darkening around the edges of the photograph, creating a subtle framing for the viewer. Or, you can have it bolder making a direct statement for your picture. Both techniques accomplish different things so you’ll have to play around with this feature to figure out what you like.
Advanced Editing
If you want to step up your photo editing skills, you might invest in a better editing program. One of the best platforms to do this is with Capture One or Adobe Lightroom. It is simple to pick up, and you can get stunning results with the editing tools available. If you are wanting to focus more on changing the background or making more drastic changes, Luminar or Adobe Photoshop is better.
You have access to tools that will allow you to focus on making more commercial photographs. There is a lot of versatility that you can get from using both of these platforms. They still have the basic editing functions that we talked about earlier in the article, but there are a few more things that you can do. Unfortunately, we can’t cover all of the complex tools that you can use in one article. But, it may be fun just to explore and figure out the tools on your own.
Highlights
Understanding how to use highlights effectively can make your photos look extremely professional. Highlights refer to the areas where the light is the brightest. This means that you can have multiple highlights in one photograph; light doesn’t fall uniformly in one place.
If we take the example of a portrait, the highlights are likely to be the white squares or circles (catch light) in the eyes. Another potential place for a highlight is on the nose or chin. It will depend on the light source and what direction the light is hitting the person at. Depending on the overall effect of the photo you are going for, you can either increase or decrease the amount of attention you want the viewer to spend looking at the highlights.
If we continue with the example of a portrait, you may decide that you want a lighter mood. This can be achieved by increasing the highlights in the eyes, just slightly. This will make the individual’s eyes appear more captivating and bright. The viewer will be drawn into the eyes.
Gradients
As a quick refresher, a gradient is a gradual change from a shade to a hue of a color. Sometimes, the exposure of a photo may be where we want it, but we want to create a more direct eye-line for where the viewer looks. This can be achieved when we use gradients. This is a nifty tool in Capture One or Adobe Lightroom. When you select a gradient you’ll want to figure out how you want to direct the light change. It may be that you have the gradient start dark at the top of the photo and then slowly transition to light.
You can also do multiple gradients when you use Capture One or Adobe Lightroom. This allows you to really control where your viewer looks. It is an extremely useful tool to help you create visually capturing photographs. However, it is important that you are aware of gradients crossing one another. It can lead to the light source looking unnatural and out of place.
Noise Correction
Another useful editing tool is noise correction. Noise in photography refers to the amount of pixilation that is happening. Basically, how grainy does your photo look. The more advanced programs can reduce some of that graininess. If you try to correct a grainy photo too much, it isn’t going to look good. The noise correction feature is for small corrections, not large ones. If you have a grainy photo to begin with, there is very little you can do to fix it.
Editing Filters
Outside of the corrections you can make to your photo, you can also decide to apply different editing filters. These can give a different feel and message to the same photo. These editing filters can make a photo look vintage or make it more abstract. These filters help you to look at your photo from a different perspective.
Sepia
Sepia is a fun filter to try out. Your photo is transformed from the broad spectrum of colors it typically has to a monochromatic photo that is black-and-white with an overlay of brown. The sepia filter helps soften the harshness that black-and-white photos typically have. It is a fun way to experiment with what filters work well for what you want your message to be when you take your photographs.
Pixels are red, green, blue, not yellow.