
One of the most important factors in photography is its composition. How do you frame your subject or position its elements to create both a focal point and a sense of balance and harmony?
One simple trick that all photographers—and even painters and other visual artists use—is The Rule of Third, also known as the Third Rule. Find out how it works, and some tips on how to apply it, and occasionally break it to create stunning pictures.
What is the Rule of Thirds?
The Rule of Thirds is an imaginary grid that helps you decide where to position your focal point.
It is a lot like a tic tac toe grid, with three horizontal lines that intersect with three vertical lines. This divides your photo into 9 equal parts. When you frame your subject, make sure that the points of interest fall on the intersecting points.
Why is the Rule of Thirds important?
The biggest mistake that new photographers make is to put the subject in the center of the photo.
However, studies show that people are more likely to look at the intersection points. Then, their eyes move around the photo, taking in any other details before focusing on the center. If you use the Rule of Thirds when you compose your photo, you work with their natural eye movement.
The Rule of Thirds also ensures that you have negative space or an area of your photo that has minimal details or even left bare or blurred. Negative space helps keep the viewer’s attention on the key elements. It also adds drama, contrast, and even mood.
How can I apply the Rule of Thirds in photography?
Many digital cameras already use the Third Rule grid in the viewfinder or LCD display. If it doesn’t currently appear in your camera, go to the settings and look for features like “Grid”.
Try practicing it in different photo compositions.
- Take a picture of the subject against a bare background (for example: a tree against the sky, or a bowl of fruit on a table, or a person standing in front of a wall). Compare the shot when the focal point is in the center, takes up 2/3 of the grid, or 1/3 of the grid.
- Crop an existing photo so that the main focal point falls in one of the intersection points. Compare the eye movement or the mood or impact of the original and the edited photo.
How do I use the Rule of Thirds in portrait photography?
Positioning your subject in the center often leads to portraits that look like mugshots or passport photos. Seat your subject so he or she is sitting a little off-center.
Since it is instinctive for people to look at the eyes of a person in any photo. Angle or frame your photo in a way that the eyes fall on one of the intersection points.

If you are photographing several people, you can seat them so that their faces are in one of the intersection points. If you are taking a picture of a person in a very busy background, try positioning him along the left vertical line in the Third Rule grid. People tend to scan from left to right, so just using this “dominant position” will help draw attention to your subject.
How do I use the Rule of Thirds in street photography?
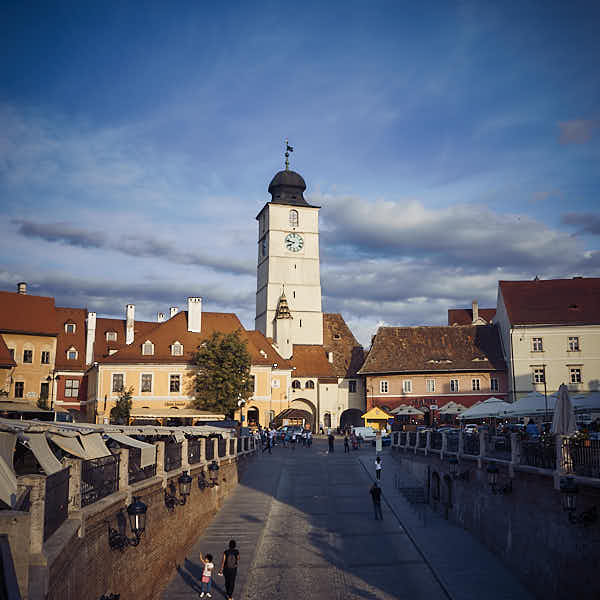
The Rule of Thirds is particularly helpful in street photography, where you have to capture a subject in a busy natural environment. By positioning the subject in the intersection point, you help draw the viewer’s eye to it. He immediately knows, “This is the most important detail.”

Look at how the focal point then directs the eye to other details. For example, instead of having a person look directly at you, ask him to look to the side. The viewer will then follow his gaze—and notice the other points in the picture.
You can also use the Third Grid to determine the other important details that will add context, color, or contrast to your photo. These details should fall on the other intersection points. As the viewer looks at them, he will be able to understand the story/mood/scene that you are trying to capture.
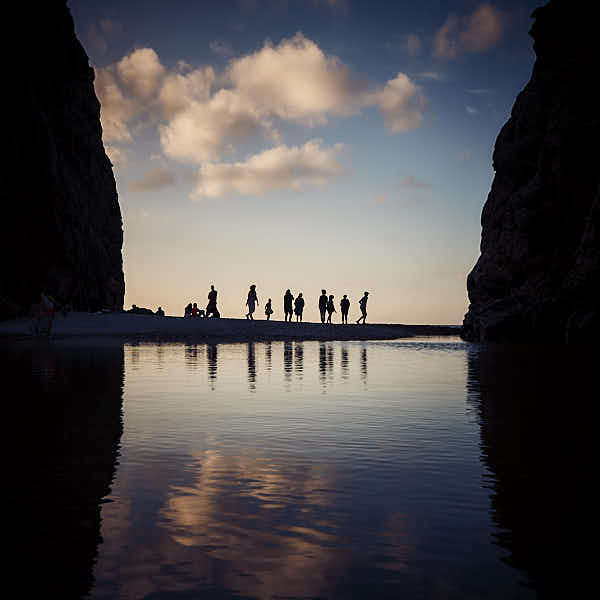
How do I use the Rule of Thirds in landscape or nature photography?
Have you ever taken 50 shots of a beautiful flower or sunset and later thought, “They all look the same?” Use the Rule of Thirds to think of fresh angles of the same subject.

Experiment with positioning the focal point at different intersection points. See how it changes as you place it off-center. Change your distance or your angle to include other objects in the photo. Try blurring the background for a bokeh effect to create negative space.
Learn the Rule of Thirds—but don’t be afraid to break it
The Rule of Thirds can be very helpful in learning composition and visual harmony. However, don’t let it limit your creative expression and experimentation.

Sometimes, intentionally breaking the Rule of Thirds can create very memorable photos. The secret is to break it dramatically. For example, you can use it to emphasize perfect symmetry or to draw attention to somebody’s eyes. In other words, if you are going to put your subject in the center, then that focal point must have a very high impact.
But whether you decide to use it or to lose it, The Rule of Thirds is one of the most important theories in photography.